What are “Render Pipelines” in Unity?
Objective: introduce the reader to Unity’s rendering pipelines. What are they? What do they do? Which one should you use? And other little tidbits of information.

Let’s set the stage…You’ve just finished spending a few hours (or days) setting up your game scene using the latest version of Unity. By default, you selected the basic 3D Core template when you initially created your project through the Unity Hub, but you’ve noticed there were other options: 3D Sample Scene (URP) and 3D Sample Scene (HDRP).
As a fairly new developer, you are curious (yet remain cautious) as to what these are. It sounds weird. Will it break your project? You decide to explore a little more…
Unity gives you the option to choose between three standard prebuilt render pipelines, each with different capabilities and performance characteristics, or you can create your own (which is what any good aspiring software engineer should strive for).
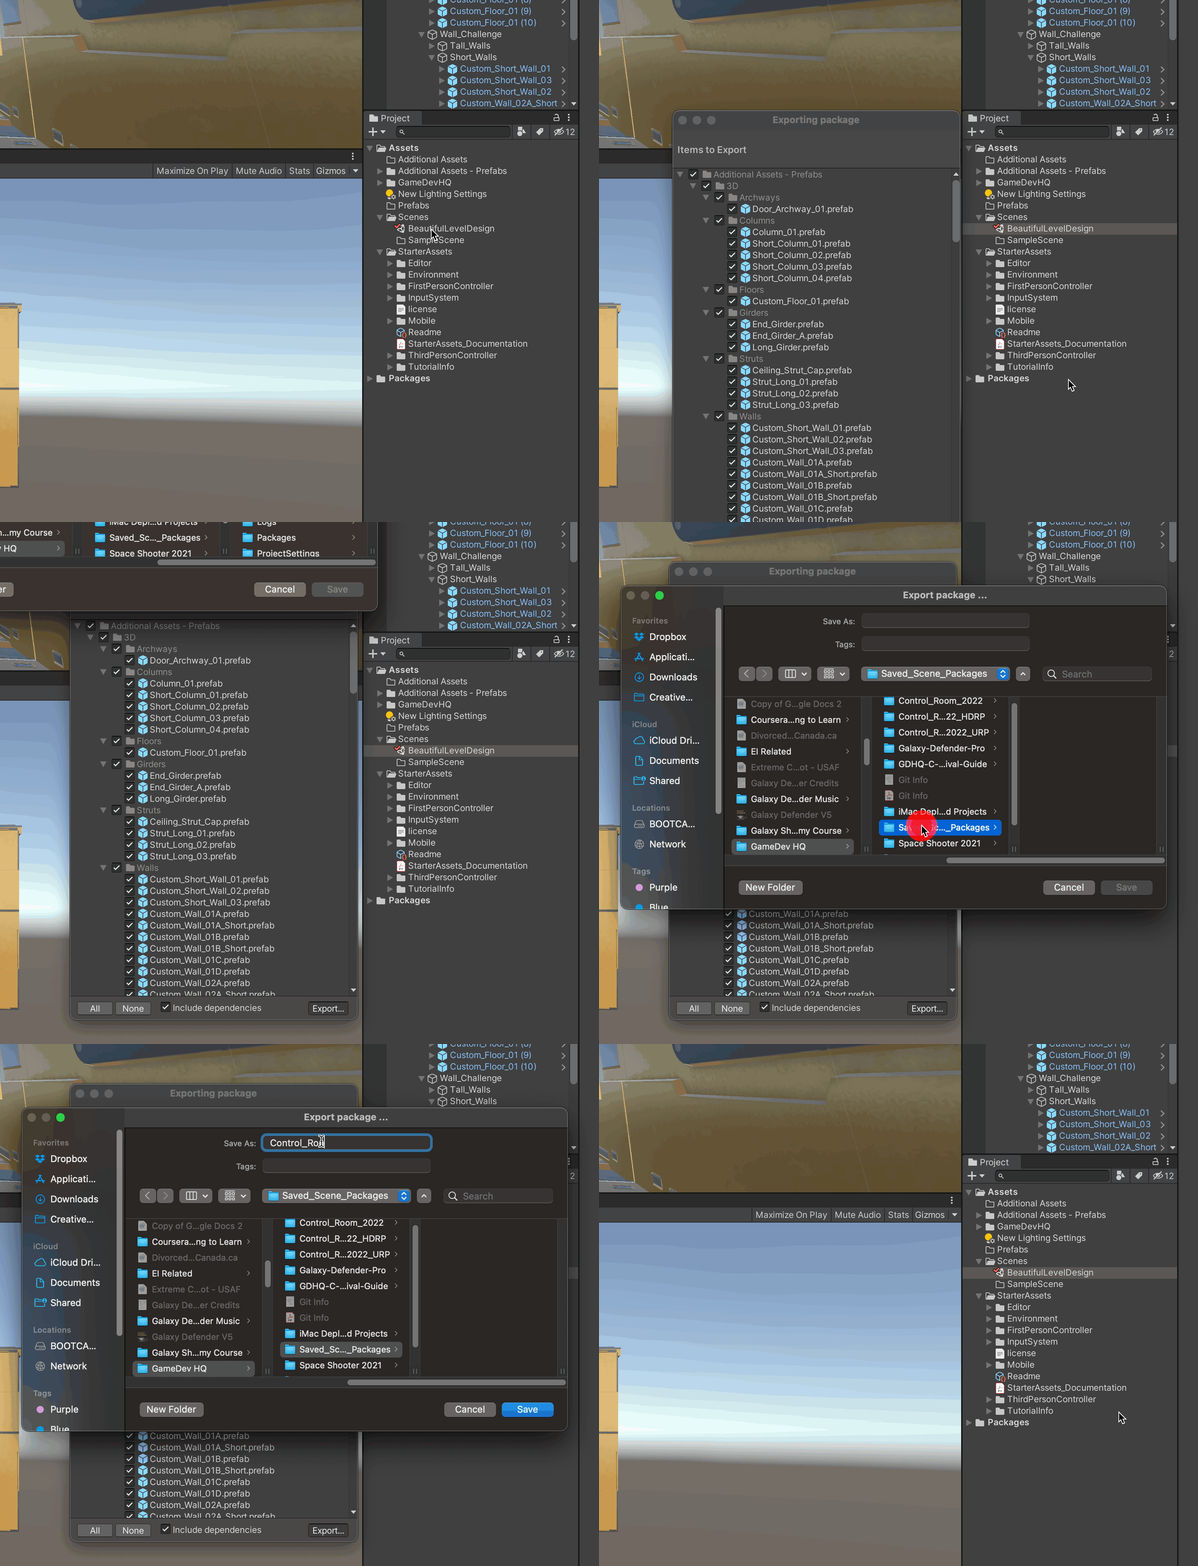
You should remember to always export your finished Scene file before you start messing with unfamiliar territory, because you may not know necessarily which of these pipelines you will decide to use for your final project. This ensures you have a “clean” version of your file before you decide to commit to a specific pipeline.
Right-Click on the Scene, select “Export to Package”, give it a unique name and save it to a safe location for future reference. This way, if things go sideways and you make an irreversible error, you can always retrieve the original file. Once this is done, you are free to experiment, add in the desired pipeline, and start making things look beautiful!
What is a pipeline in unity?
Rendering is the process of drawing a scene on the computer screen.
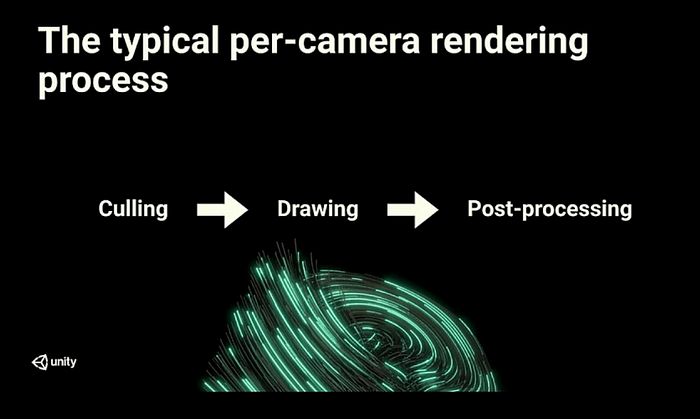
A render pipeline performs a series of steps that take the contents of a Scene and displays them on your screen. These steps are completed in three main stages, repeated many times a second according to your frame rate:
- Culling: it lists the objects that need to be rendered, preferably the ones visible to the camera (frustum culling) and unoccluded by other objects (occlusion culling).
- Rendering: the drawing of these objects, with the correct lighting and some of their properties, into pixel-based buffers.
- Post-processing: operations that can be carried out on these buffers, for instance applying color grading, bloom, and depth of field, to generate the final output frame that is sent to a display device.
Render pipelines, because they use different shader outputs, have unique capabilities and performance characteristics, and are suitable for specific games, applications, and platforms. It is therefore important to understand the various render pipelines so that you can make the right decision for your project early in development.
Which render pipeline should you use?
Unity offers the following render pipelines:
- The Built-in Render Pipeline is Unity’s default render pipeline. It is a general-purpose render pipeline that has limited options for customization.
- The Universal Render Pipeline (URP) is a Scriptable Render Pipeline that is quick and easy to customize, and lets you create optimized graphics across a wide range of platforms, from mobile to high-end consoles and PCs. An earlier version of URP was called the Lightweight Render Pipeline (LWRP). URP replaced LWRP.
- The High Definition Render Pipeline (HDRP) is a Scriptable Render Pipeline that lets you create cutting-edge, high-fidelity graphics on high-end platforms. NOTE: Projects that you make with HDRP are not compatible with the Universal Render Pipeline (URP).
- You can create your own custom render pipeline using Unity’s Scriptable Render Pipeline (SRP) API.
As soon as you change the active render pipeline in the Unity Editor or at runtime, Unity uses the new active render pipeline to render content. If you are in the Unity Editor, this includes the Game view, the Scene view, and previews for Materials in the Project panel and the Inspector.
SRPs are highly configurable, and changing the active render pipeline can result in very minor or very large changes. This will impact performance.
Unity has this cool graph that summarizes it all well:

When you change the active render pipeline, you must ensure that the assets and code in your project are compatible with the new render pipeline; otherwise, you might experience errors or unintended visual effects. We’ll see an example of this when we take my earlier Scene and import it into a URP project.
So the easiest way to upgrade my earlier project from the standard Built-In Render Pipeline to URP is actually to build a brand new project. This time, select 3D Sample Scene (URP) from the Unity Hub.

Remember my Control Room Scene I exported earlier as a package? Well, this is where we save ourselves a lot of work and import that same package into the URP provided template.
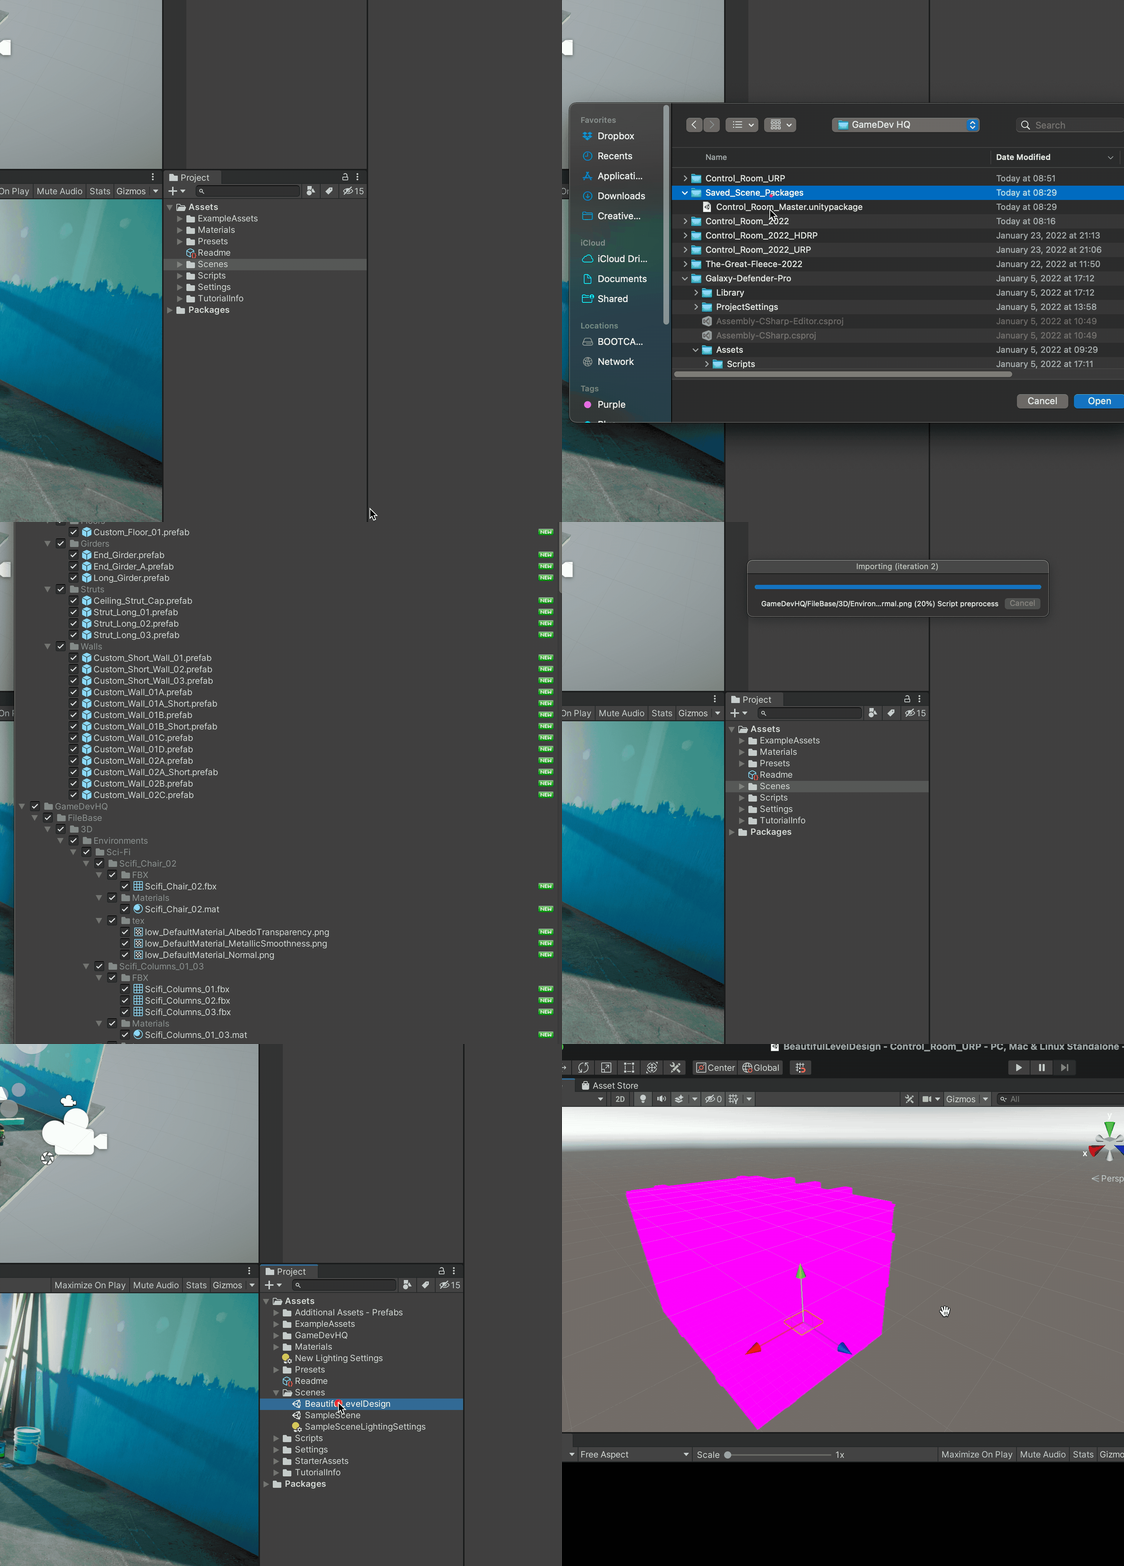
As you can see, once you open up the imported scene, everything looks pink. Don’t panic! This is correct and it happens because the game objects are all using Standard Shaders.
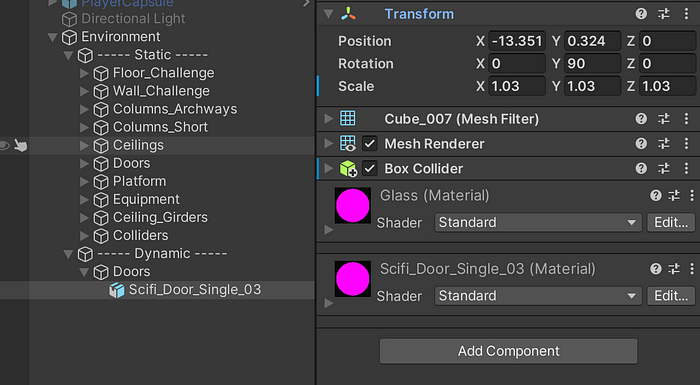
What you need to do is change the Shaders from Standard to Universal Render Pipeline, and then select the appropriate one for your needs.
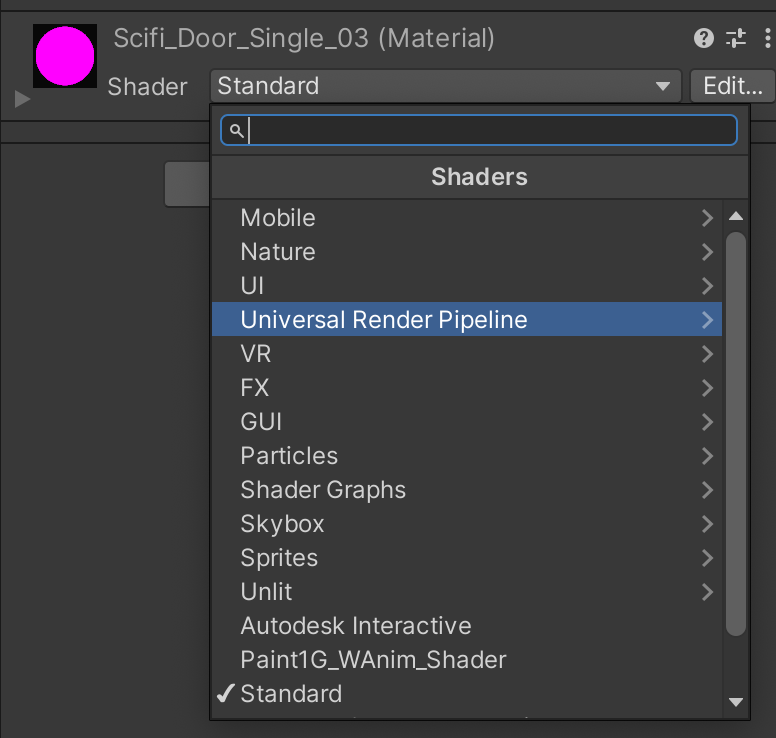
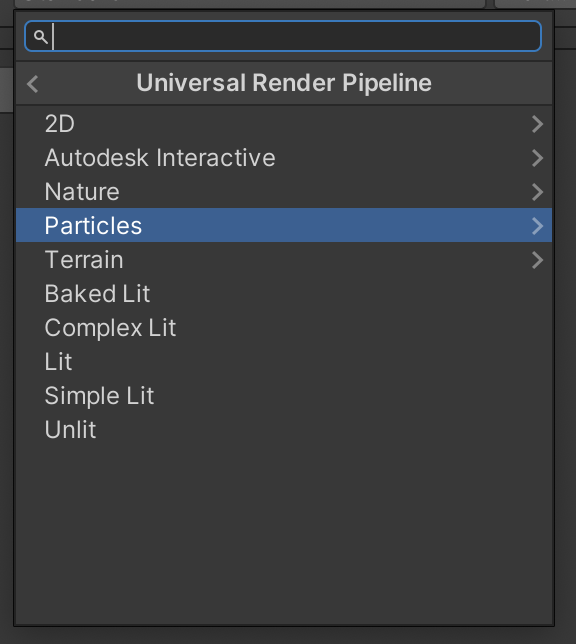
You can imagine, if you have a Scene with hundreds, or thousands, of game objects, this would be a daunting task. There is an easy solution! Simply go to Edit /Render Pipeline /Universal Render Pipeline and select Upgrade Project Materials to UniversalRP Materials.
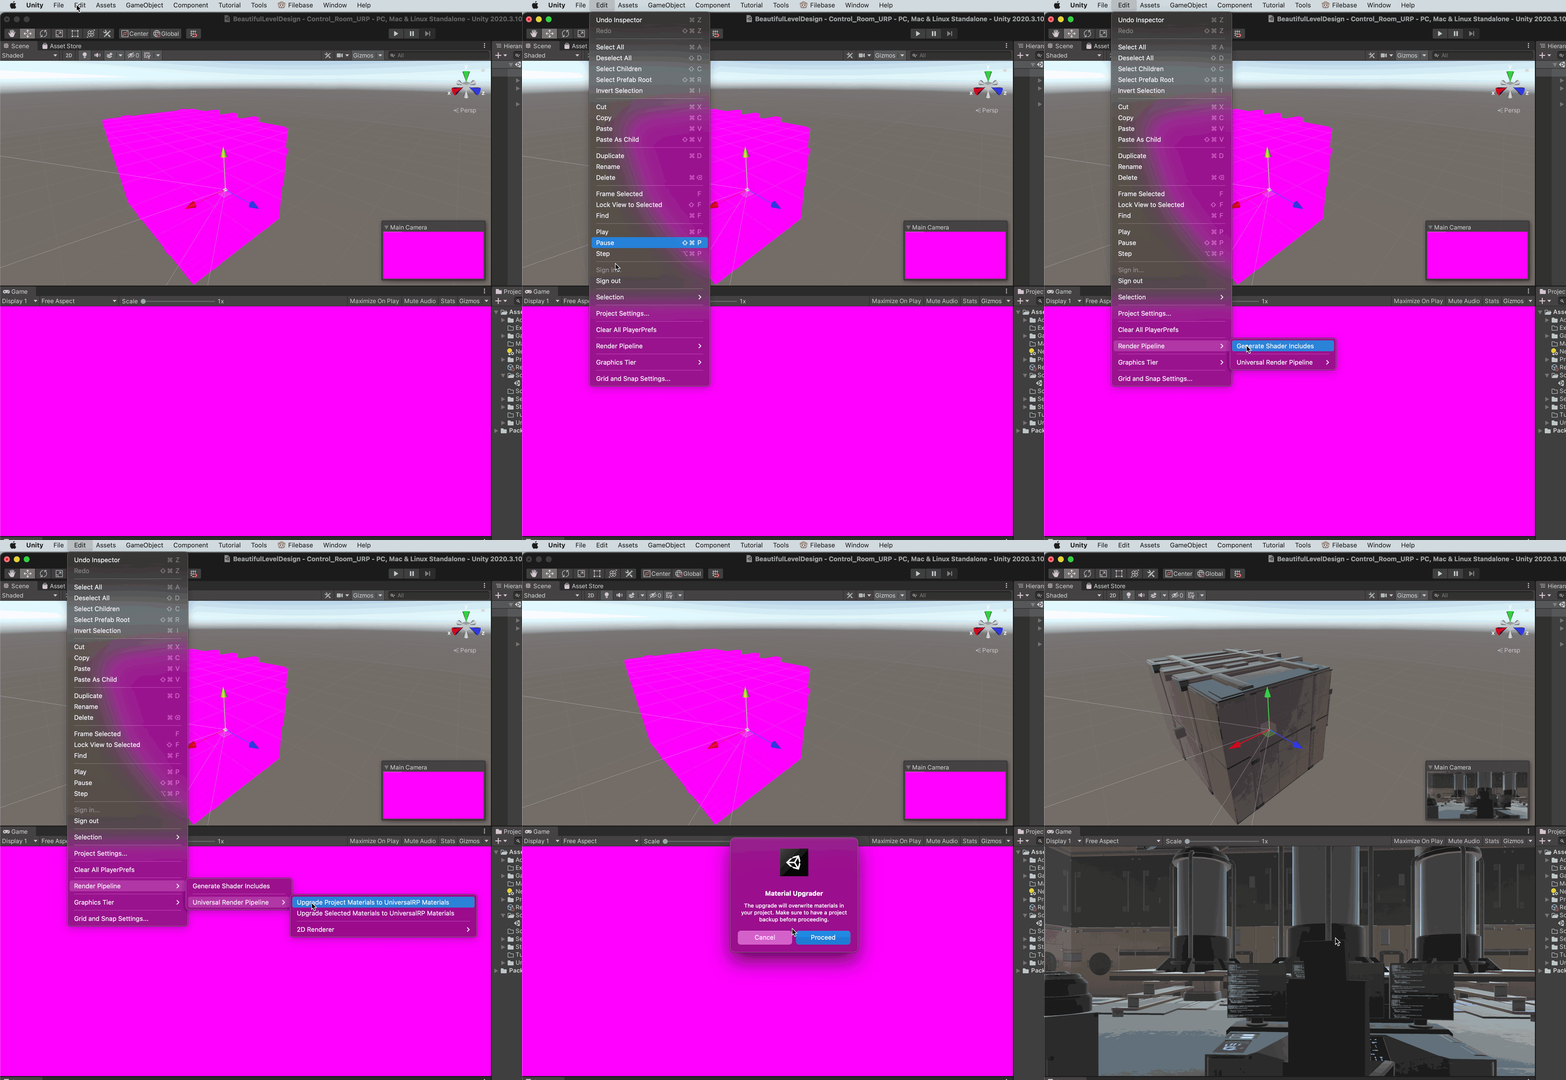
It may happen that an Asset remains pink, in which case you will need to go through the steps manually and go into its Shader Pipeline to modify the Shaders. Luckily, in our case, everything seems to have been adjusted correctly.
What about HDRP? Just follow the same process. Open a new Project with the HDRP template, import the original Scene package and upgrade the Materials using the HRDP option (Unity’s dropdown will detect you have a HDRP Project open and modify the available options as required).
There you have it. I hope I’ve managed to pass on enough information to make Render Pipelines a bit less daunting and mysterious. Unity did an awesome job with the documentation, and you should keep it close at hand when you start experimenting.
As always, thanks for reading :)
